Social Media & Scenes
Add a Notification Overlay to a Scene
Add a fictional incoming message or call banner to any scene. Choose the sender, platform, and overlay theme, then save and review the result.
By austudioPublished Updated
A notification overlay adds a fictional incoming message or call banner above your scene content. Use it to interrupt a conversation, introduce a story clue, or show that another Character is trying to reach someone.
In this tutorial, you will add a WhatsApp message from Rowan to Mira’s scene, then try the incoming-call version.
Before you begin
You will need:
- An AU Studio project.
- A scene to display the notification.
- A Character in the project to use as the notification sender.
For this example, open a scene featuring Mira and use Rowan as the sender.
Notification overlays use the Character’s name and avatar. A social account is not required for the overlay.
1. Open Notification Overlay
- Open your project in Studio.
- Select the scene you want to edit.
- Find Notification Overlay in the general scene properties area.
- Expand the section.
The section summary shows the saved state: On or Off.
Each scene supports one overlay. You can add it to any scene type, including Profile, Social Media Post, chat, and Lock Screen scenes.
2. Enable the overlay
Check Enable notification overlay.
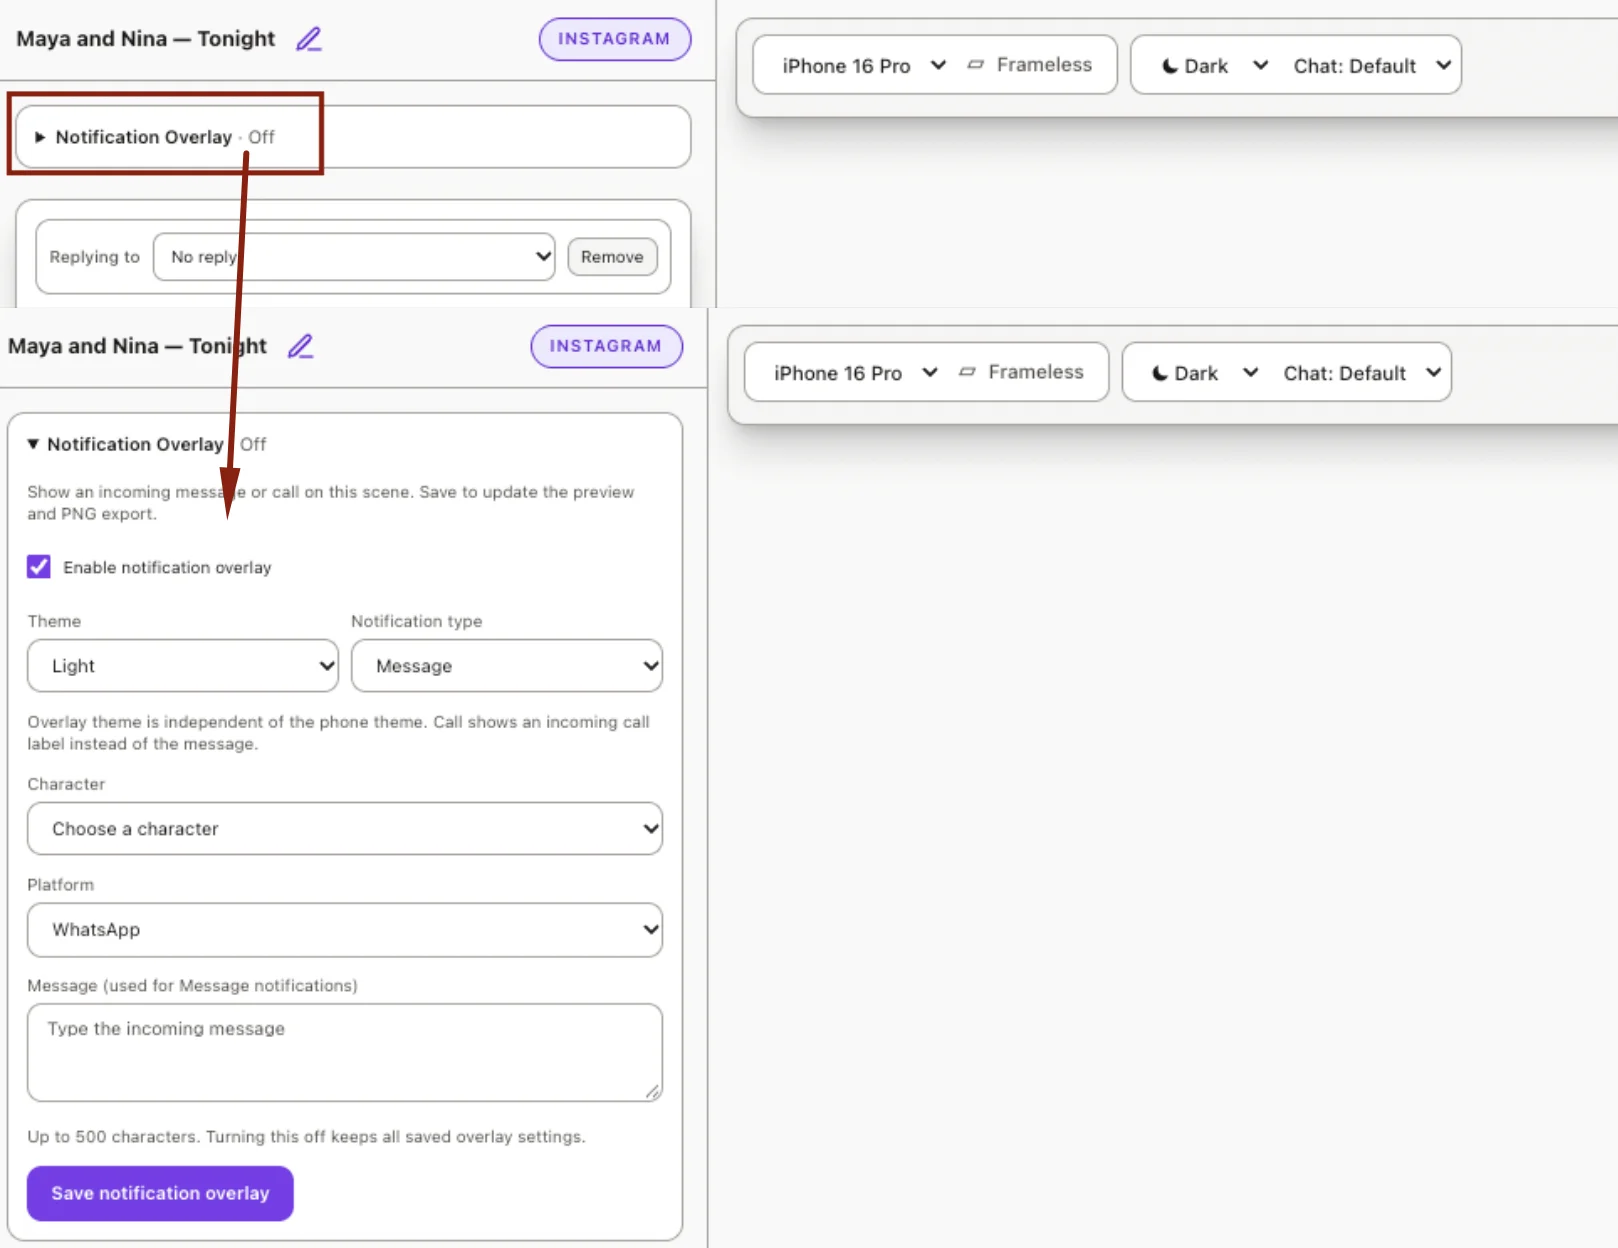
Configure these fields:
| Field | Example |
|---|---|
| Theme | Light |
| Notification type | Message |
| Character | Rowan |
| Platform |
The overlay platform is independent of the scene’s platform. For example, a WhatsApp notification can appear over an Instagram post.
Available platform choices are iMessage, WhatsApp, TikTok Chat, LINE, Facebook Messenger, Snapchat, Discord, and Instagram DM.
3. Write the incoming message
In Message (used for Message notifications), enter:
Mira, check your bag. I think I gave you the wrong notebook.
Message notifications require text and support up to 500 characters.
Keep the message short if you want readers to see it in full. The banner displays up to four lines, so longer text may be cut off visually.
4. Save and review the banner
Click Save notification overlay.
After saving, check that:
- The section summary shows On.
- Rowan’s name and avatar appear in the banner.
- The platform badge matches WhatsApp.
- Your message appears beneath Rowan’s name.
- The banner displays below the phone’s status bar.
If Rowan has no avatar, the banner uses an initial instead.
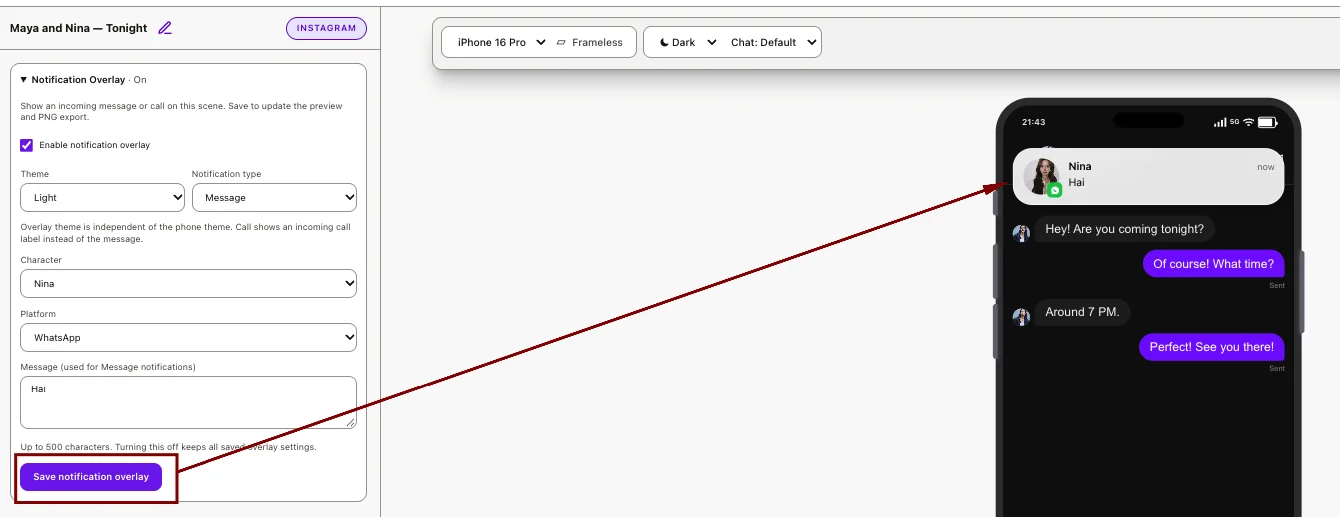
The time label always reads now. The overlay is static: it does not deliver a real message, animate into view, or disappear after a timer.
5. Try the Dark theme
- Change Theme to Dark.
- Click Save notification overlay.
- Review the banner against your scene.
The overlay theme is independent of the phone theme. You can use a dark notification on a light phone preview or a light notification on a dark preview.
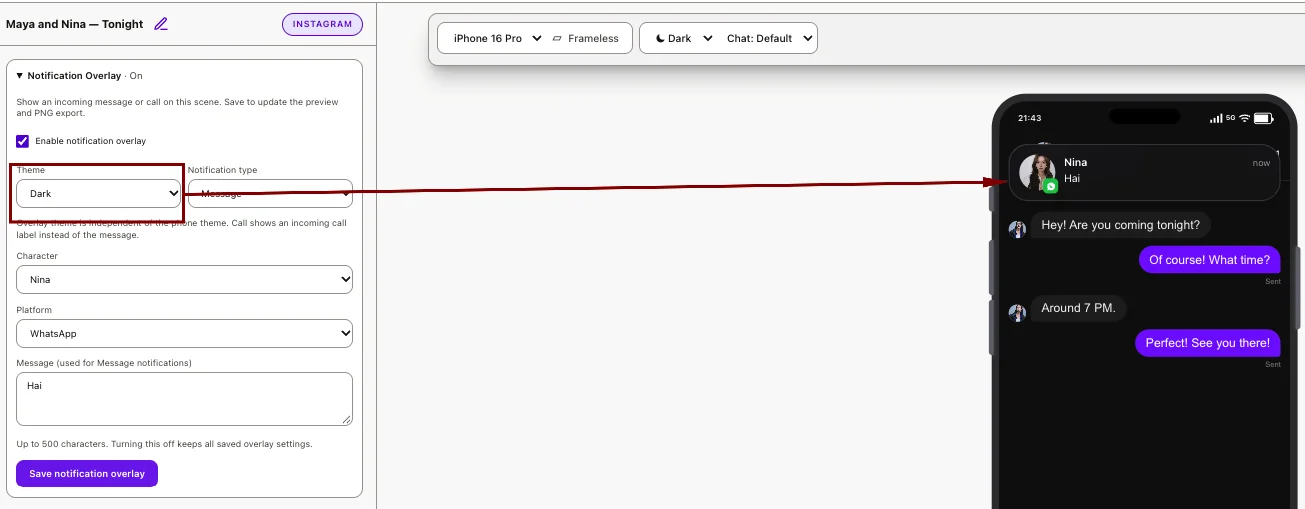
Choose the combination that keeps the notification easy to read.
6. Switch to an incoming call
To turn the message into a call notification:
- Change Notification type to Call.
- Keep Rowan selected in Character.
- Keep WhatsApp selected in Platform.
- Click Save notification overlay.
The banner now shows a phone icon and Incoming call instead of the message.
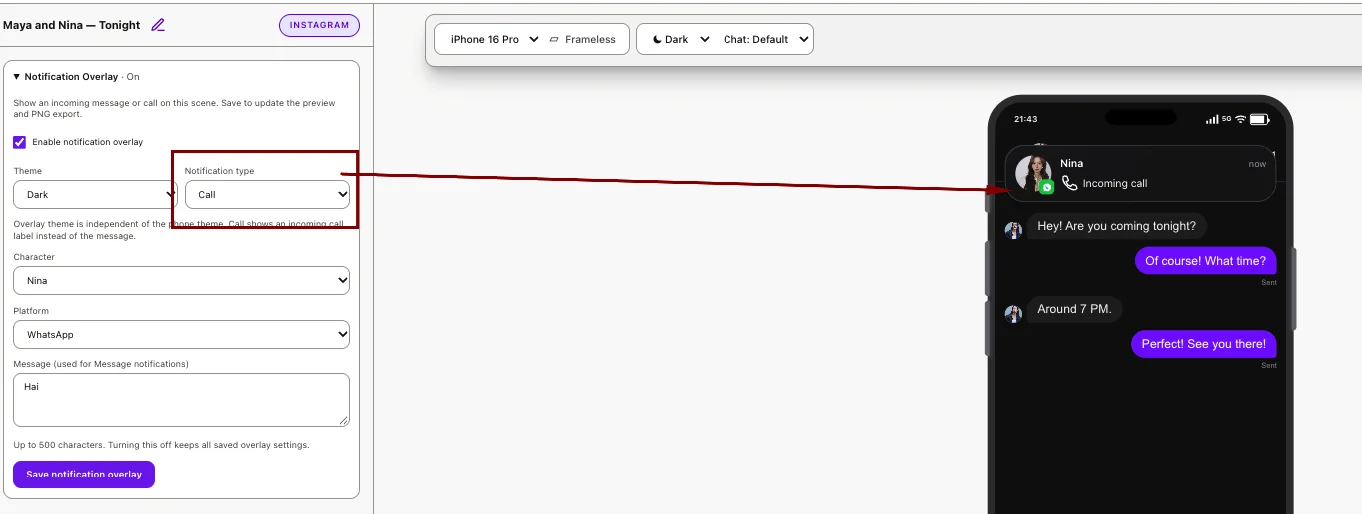
Call notifications do not require message text. Leave your existing message in its field if you want to reuse it later. To display it again, choose Message and save.
This is a visual call notification; it does not start a call.
7. Export the scene
If your scene provides Export PNG:
- Save the notification overlay.
- Review the banner in the phone preview.
- Click Export PNG.
- Open the downloaded image and check that the banner appears correctly.
The saved overlay is included in the scene’s PNG output. Check longer messages before export because the banner’s four-line display limit also affects the captured image.
8. Turn the overlay off
To hide the banner:
- Clear Enable notification overlay.
- Click Save notification overlay.
The section summary changes to Off, and the banner disappears.
Disabling the overlay preserves its previously saved settings. To restore it, enable it again and save.
Common problems
The overlay does not appear
Check that Enable notification overlay is selected, a valid Character is chosen, and you clicked Save notification overlay.
For Message notifications, enter message text.
The selected Character is unavailable
If the sender was removed from the project, the banner is hidden. Open Notification Overlay, select another Character, and save.
The banner shows the Character name instead of a social username
The overlay uses the selected Character’s current name and avatar. Choosing a platform changes the platform badge.
Changing the phone theme does not change the notification
Set Theme inside Notification Overlay, then save. Its Light/Dark setting is independent of the phone appearance.
My message is not fully visible
The banner displays up to four lines. Shorten the message and save again.
The notification is missing from my export
Confirm that the overlay was saved and appears in the preview before exporting again.
I want several notifications or a different timestamp
Each scene supports one overlay with a fixed now label. Use separate scenes to show different notification moments.